이전에 훈련한 YOLO v4의 가중치들을 가지고 opencv를 통해 피자의 위치를 안내하는 프로그램을 만들어 보자!
훈련된 YOLO v4 detection모델 사용법과 opencv와 함께 이용하는 방법을 작성하였다.
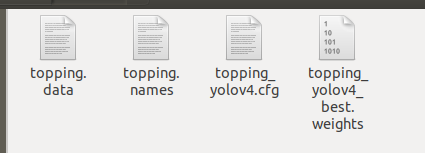
이 과정에는 준비된 cfg, data, names파일과 훈련된 weight파일이 필요하므로 앞의 YOLO 설치법과 훈련법을 보고 오면 좋다.
2020/05/19 - [Computer Vision/Object detection] - Ubuntu 18.04 에서 Yolo v4 설치하기
Ubuntu 18.04 에서 Yolo v4 설치하기
YOLO v3에 대해서는 자료도 많고, 관심도 많고, 논문, 리뷰 모두 많이 봤을거라 생각한다. 하지만 YOLO v4의 소식이 있고 실제로 코드들도 github에 업로드 되어 있다. (YOLO v4에 대한 자세한 내용은 아��
keyog.tistory.com
2020/05/19 - [Computer Vision/Object detection] - YOLO v4 custom데이터 훈련하기
YOLO v4 custom데이터 훈련하기
이전에 YOLO v4를 설치해서 example실행 까지 잘 마쳤다면, 이제 본인의 데이터를 훈련시키고 응용하는 것까지 알아보도록 하자. YOLO v4 설치에 관해서는 이전글 참조. 2020/05/19 - [Computer Vision/Object det.
keyog.tistory.com
가장 먼저 config파일, data파일 weight파일 등을 준비해서 원하는 폴더에 옮겨주자.
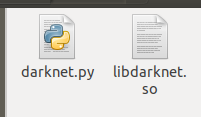
그 다음 darknet을 설치했던 폴더에 가면 우리가 설치할 때, 생성된 libdarknet.so파일과 example로 들어 있는 darknet.py파일이 있다. 이 두가지를 역시 해당 폴더에 옮겨 주자.
모두 옮겼다면, 가장먼저 darknet.py를 열어 수정을 해주자. 267번째 줄에 있는 detect_image함수의
im, arr = array_to_image(custom_image) 가 주석이 되어있는 것을 확인할 수 있다. 이것의 주석을 풀고, custom_image변수를 im으로 변경해주자.
def detect_image(net, meta, im, thresh=.5, hier_thresh=.5, nms=.45, debug= False):
    #import cv2
    #custom_image_bgr = cv2.imread(image) # use: detect(,,imagePath,)
    #custom_image = cv2.cvtColor(custom_image_bgr, cv2.COLOR_BGR2RGB)
    #custom_image = cv2.resize(custom_image,(lib.network_width(net), lib.network_height(net)), interpolation = cv2.INTER_LINEAR)
    #import scipy.misc
    #custom_image = scipy.misc.imread(image)
    im, arr = array_to_image(im)		# you should comment line below: free_image(im)

    num = c_int(0)
    if debug: print("Assigned num")
    pnum = pointer(num)
    if debug: print("Assigned pnum")
    predict_image(net, im)
    letter_box = 0
그럼 이제 모든 준비가 끝났다!.
드디어 이제 우리가 좋아하는 코딩을 해서 프로그램을 만들어 볼 시간이다.
필자는 opencv를 이용하여 웹캠을 받아 피자의 위치를 안내할 수 있는 프로그램을 만들어 주었다.
라이브러리 import와 모델 불러오기
import numpy as np
import darknet
import cv2

net = darknet.load_net("./topping_yolov4.cfg".encode('utf-8'),"./topping_yolov4_best.weights".encode('utf-8'), 0)
meta = darknet.load_meta("./topping.data".encode('utf-8'))
darknet을 import 하여 모델을 불러와 주자.
그 다음 웹캠을 opencv로 읽어 오기 위해 설정을 해주자.
cap = cv2.VideoCapture(0)

while True:
	ret, frame = cap.read()

	cv2.imshow('frame',frame)
	k = cv2.waitKey(1)
	if k == 27 :
		break

cv2.destroyAllWindows()
cap.release()
이제 짜여진 코드 위에 불러온 YOLO모델을 올려서 detection 결과를 가져와 보자.
(redmon의 darknet을 사용할 경우 detect_image대신 detect를 사용하면 된다.)
cap = cv2.VideoCapture(0)

while True:
	ret, frame = cap.read()
	detections = darknet.detect_image(self.net, self.meta, rgb_img , thresh=0.25)

	cv2.imshow('frame',frame)
	k = cv2.waitKey(1)
	if k == 27 :
		break

cv2.destroyAllWindows()
cap.release()
darknet의 detect함수를 실행하면 array가 나오는데
[ label이름, score, (Bbox 중심x, Bbox의 중심y, 넓이, 높이) ] 의 순서로 튀어나온다.
이것을 활용하기 위해 함수를 하나 만들어서 분리한다음 변수에 넣어주자.
def retbox(detections,i,frame) :
	label = detections[i][0].decode('utf-8')
	score = detections[i][1]

	x1 = int(round((detections[i][2][0]) - (detections[i][2][2]/2.0))) # top left x1
	y1 = int(round((detections[i][2][1]) - (detections[i][2][3]/2.0))) # top left xy
	x2 = int(round((detections[i][2][0]) + (detections[i][2][2]/2.0))) # bottom right x2
	y2 = int(round((detections[i][2][1]) + (detections[i][2][3]/2.0))) # bottom right y2

	box = np.array([x1,y1,x2,y2])

	return label, score, box

cap = cv2.VideoCapture(0)
threshold = 0.9

while True:
	ret, frame = cap.read()
	detections = darknet.detect_image(net,meta, frame , thresh=.15)

	for i in range(len(detections)) :
		label , score , box  = retbox(detections,i,frame,labels_arr)
		if score < threshold :
			break
		else :
			left,top,right,bottom=box

	cv2.imshow('frame',frame)
	k = cv2.waitKey(1)
	if k == 27 :
		break

cv2.destroyAllWindows()
cap.release()
여기 까지가 YOLO를 코드위에 올려서 이용하는 방법이고, 이것을 토대로 응용하면 된다.
그럼 이 글의 당초 목적 대로 피자의 위치를 판단하기위해 이것의 위치를 받고, 가상의 선을 그어
그 선에 대해 안내 문구를 띄워주는 프로그램을 만들어 보았다.
def pizza_status(y1,y2,frame) :
	if y2 > frame.shape[0]*14/20 :
		#pull
		status = 'pull'
		line_color_b = (0,0,255)
		txt_color = (0,0,255)

	elif y1 < frame.shape[0]*6/20 :
		#push
		status = 'push'
		line_color_f = (0,0,255)
		txt_color = (0,0,255)

	elif y2 < frame.shape[0]*14/20 and x1 > rgb_img.shape[0]*6/20 :
		#ok
		status = 'ok'
		txt_color = (0,255,0)

	return status,line_color_f,line_color_b,txt_color
y좌표를 이용해서 위치를 받아와서 해당 위치에 맞는 status값을 생성 해준다.
그에 맞는 status값과 표시할 색을 반환해주면 피자의 위치를 안내할 수 있게 된다.
전체 코드
def retbox(detections,i,frame) :
	label = detections[i][0].decode('utf-8')
	score = detections[i][1]
	classes = labels_arr.index(label)

	x1 = int(round((detections[i][2][0]) - (detections[i][2][2]/2.0))) # top left x1
	y1 = int(round((detections[i][2][1]) - (detections[i][2][3]/2.0))) # top left xy
	x2 = int(round((detections[i][2][0]) + (detections[i][2][2]/2.0))) # bottom right x2
	y2 = int(round((detections[i][2][1]) + (detections[i][2][3]/2.0))) # bottom right y2

	box = np.array([x1,y1,x2,y2])

	return label, score, box

def pizza_status(y1,y2,frame) :
	if y2 > frame.shape[0]*14/20 :
		#pull
		status = 'pull'
		line_color_b = (0,0,255)
		txt_color = (0,0,255)

	elif y1 < frame.shape[0]*6/20 :
		#push
		status = 'push'
		line_color_f = (0,0,255)
		txt_color = (0,0,255)

	elif y2 < frame.shape[0]*14/20 and x1 > rgb_img.shape[0]*6/20 :
		#ok
		status = 'ok'
		txt_color = (0,255,0)

	return status,line_color_f,line_color_b,txt_color


cap = cv2.VideoCapture(0)
threshold = 0.9

stauts = ''
line_color_f,line_color_b,txt_color = (0,255,0),(0,255,0),(0,255,0)

while True:
	ret, frame = cap.read()
	detections = darknet.detect_image(net,meta, frame , thresh=.15)

	for i in range(len(detections)) :
		label , score , box = retbox(detections,i,frame,labels_arr)
		left,top,right,bottom=box
		#-----Draw Bounding box-----
		#cv2.putText(frame, label, (x1,y1), cv2.FONT_HERSHEY_SIMPLEX, 2, rgb, 3)
		#cv2.rectangle(frame, (x1,y1), (x2,y2), rgb, 3)
		#---------------------------
		if label == 'pizza' :
			status,line_color_f,line_color_b,txt_color = pizza_status(top,bottom,frame)

	cv2.putText(frame, status, (100,50), cv2.FONT_HERSHEY_SIMPLEX, 2, txt_color, 3)
	cv2.line(frame,(int(frame.shape[0]*6/20),0),(int(frame.shape[1]*6/20),frame.shape[0]),line_color_f,2)
	cv2.line(frame,(int(frame.shape[0]*14/20),0),(int(frame.shape[1]*14/20),frame.shape[0]),line_color_b,2)
	cv2.imshow('frame',frame)
	k = cv2.waitKey(1)
	if k == 27 :
		break

cv2.destroyAllWindows()
cap.release()
실행 예시
Detection을 직접 사용하고 그 Detection 결과로 간단한 프로그램을 만들어 보았다.
YOLO뿐만 아니라 detection알고리즘을 통해 여러가지 재미난 프로그램을 만들어 보는 기회가 있으면 좋을 것 같다.
'Computer Vision > Object detection' 카테고리의 다른 글
| Object detection mAP 측정방법 (2) | 2020.12.18 |
|---|---|
| YOLO v4 custom데이터 훈련하기 (23) | 2020.05.19 |
| Ubuntu 18.04 에서 Yolo v4 설치하기 (11) | 2020.05.19 |
| Yolo v3 custom 데이터 훈련하기 (4) | 2020.04.17 |
| Yolo v3 설치하기 (0) | 2020.04.17 |


